Managed Jobs#
SkyPilot managed jobs (sky jobs) manage the full lifecycle of a user job:
Provisioning and managing the resources, on either reserved clusters or elastic instances.
Automatically recovering from failures (job preemptions, GPU errors, node crashes, etc.) and retrying application errors.
Cleaning up the resources when done.
Use managed jobs for scaling out — running a single job for long durations, or running many jobs in parallel.
See also
Using a Pool of Workers for running batch inference workloads or workloads with expensive worker setup.
Job Groups for RL for running multiple heterogeneous tasks in parallel that can communicate with each other (e.g., RL workloads).
To start a managed job, use sky jobs launch:
$ sky jobs launch -n myjob hello_sky.yaml

Task from YAML spec: hello_sky.yaml
Managed job 'myjob' will be launched on (estimated):
Considered resources (1 node):
------------------------------------------------------------------------------------------
 INFRA              INSTANCE      vCPUs   Mem(GB)   GPUS   COST ($)   CHOSEN
------------------------------------------------------------------------------------------
 AWS (us-east-1)    m6i.2xlarge   8       32        -      0.38          ✔
------------------------------------------------------------------------------------------
Launching a managed job 'myjob'. Proceed? [Y/n]: Y
... <job is submitted and launched>
(setup pid=2383) Running setup.
(myjob, pid=2383) Hello, SkyPilot!
✓ Managed job finished: 1 (status: SUCCEEDED).

Managed Job ID: 1
📋 Useful Commands
├── To cancel the job:                sky jobs cancel 1
├── To stream job logs:               sky jobs logs 1
├── To stream controller logs:        sky jobs logs --controller 1
└── To view all managed jobs:         sky jobs queue
The job is launched on a temporary SkyPilot cluster, managed end-to-end, and automatically cleaned up.
Managed jobs have several benefits:
Auto-recover from different failures: Automatically recover from node crashes, job preemptions, GPU failures, NCCL timeouts, or hardware issues. Application errors can also be retried for a configurable number of times.
Scale across infra (clusters, regions, clouds): Easily run and manage a large number of jobs across your infrastructure choices.
Managed pipelines: Run pipelines that contain multiple tasks. Useful for running a sequence of tasks that depend on each other, e.g., data processing, training a model, and then running inference on it.
Use spot instances: Optionally run on auto-recovering spot instances to save ~70% on GPU costs while maintaining reliability through automatic preemption recovery.
Create a managed job#
A managed job is created from a standard SkyPilot YAML. For example:
# qwen_finetune.yaml
name: qwen-finetune

resources:
  accelerators: B200:8

envs:
  # Fill in your wandb key: copy from https://wandb.ai/authorize
  # Alternatively, you can use `--env WANDB_API_KEY=$WANDB_API_KEY`
  # to pass the key in the command line, during `sky jobs launch`.
  WANDB_API_KEY:

# Assume your working directory is under `~/transformers`.
# To get the code for this example, run:
# git clone https://github.com/huggingface/transformers.git ~/transformers
workdir: ~/transformers

setup: |
  pip install -e .
  cd examples/pytorch/language-modeling/
  pip install -r requirements.txt
  pip install wandb

run: |
  cd examples/pytorch/language-modeling/
  torchrun --nproc_per_node=8 run_clm.py \
    --model_name_or_path Qwen/Qwen3-8B \
    --dataset_name wikitext \
    --dataset_config_name wikitext-2-raw-v1 \
    --do_train \
    --do_eval \
    --per_device_train_batch_size 1 \
    --gradient_accumulation_steps 8 \
    --learning_rate 2e-5 \
    --num_train_epochs 3 \
    --bf16 \
    --report_to wandb \
    --output_dir /tmp/qwen_finetune/
Note
Workdir and file mounts with local files will be automatically uploaded to a cloud bucket. The bucket will be cleaned up after the job finishes.
To launch this YAML as a managed job, use sky jobs launch:
$ sky jobs launch -n qwen-finetune qwen_finetune.yaml
To see all flags, you can run sky jobs launch --help or see the CLI reference for more information.
SkyPilot will launch and start monitoring the job.
Under the hood, SkyPilot spins up a temporary cluster for the job.
If any failure happens (GPU errors, node crashes, or job preemptions), SkyPilot will automatically search for resources to re-launch the job.
Resources are cleaned up as soon as the job is finished.
Tip
You can test your YAML on unmanaged sky launch , then do a production run as a managed job using sky jobs launch.
sky launch and sky jobs launch have a similar interface, but are useful in different scenarios.
|
|
|---|---|
Long-lived, manually managed cluster |
Dedicated auto-managed cluster for each job |
Failures must be manually recovered |
Failures can be auto-recovered |
Number of parallel jobs limited by cluster resources |
Easily manage hundreds or thousands of jobs at once |
Good for interactive dev |
Good for scaling out production jobs |
Work with managed jobs#
For a list of all commands and options, run sky jobs --help or read the CLI reference.
See a list of managed jobs:
$ sky jobs queue
Fetching managed jobs...
Managed jobs:
ID  NAME           RESOURCES    SUBMITTED  TOT. DURATION  JOB DURATION  #RECOVERIES  STATUS
2   qwen-rl        1x [H200:8]  2 hrs ago  2h 47m 18s     2h 36m 18s    0            RUNNING
1   qwen-finetune  1x [B200:8]  4 hrs ago  4h 24m 26s     4h 17m 54s    0            RUNNING
This command shows 50 managed jobs by default, use --limit <num> to show more jobs or use --all to show all jobs.
Stream the logs of a running managed job:
$ sky jobs logs -n qwen-finetune  # by name
$ sky jobs logs 2           # by job ID
Cancel a managed job:
$ sky jobs cancel -n qwen-finetune  # by name
$ sky jobs cancel 2           # by job ID
Note
If any failure happens for a managed job, you can check sky jobs queue -a for the brief reason
of the failure. For more details related to provisioning, check sky jobs logs --controller <job_id>.
Viewing jobs in dashboard#
The SkyPilot dashboard, sky dashboard has a Jobs page that shows all managed jobs.
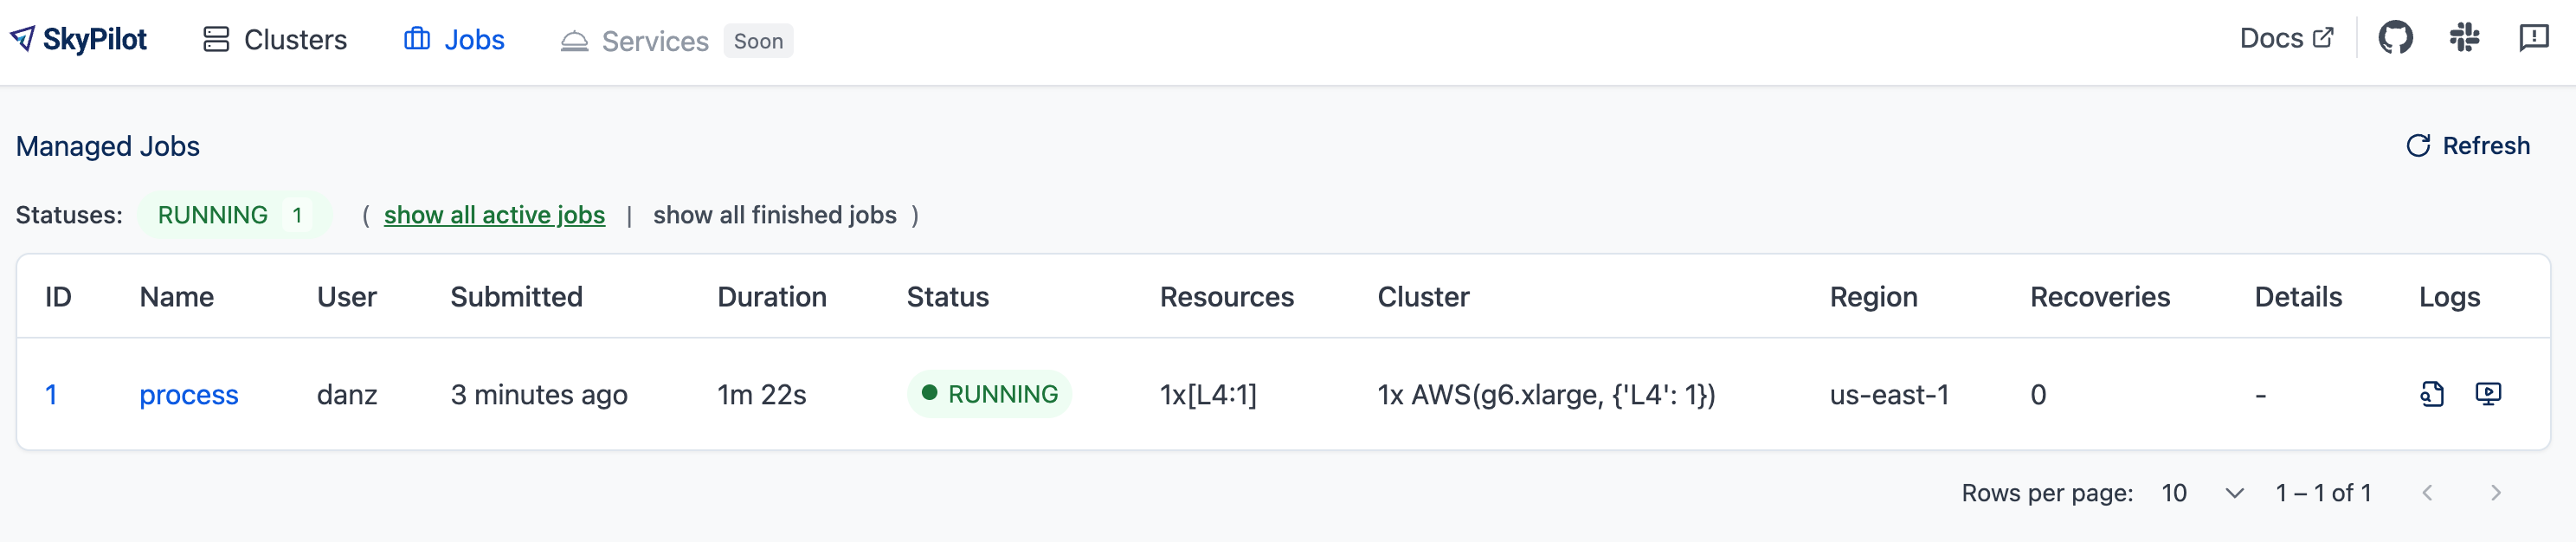
The UI shows the same information as the CLI sky jobs queue -au.
Checkpointing and recovery#
To recover quickly from failures (hardware issues, preemptions, etc.), your job should checkpoint its state periodically to persistent storage. When a job is auto-recovered after a failure, it can reload the latest checkpoint and resume from there instead of starting over.
SkyPilot supports several persistent storage options for checkpointing:
Using Kubernetes volumes#
On Kubernetes, persistent volumes provide high-performance storage for checkpoints. Volumes are ideal when your jobs run on Kubernetes clusters with shared filesystems (NFS, JuiceFS, Nebius shared filesystem, etc.).
resources:
  infra: k8s

volumes:
  /checkpoint: my-volume  # Mount a persistent volume

run: |
  # Your training script saves checkpoints to /checkpoint
  python train.py --checkpoint-dir /checkpoint
Volumes offer better performance than cloud buckets. See Volumes for setup instructions.
Using cloud buckets#
In cases where a volume is not available, use cloud bucket mounts:
file_mounts:
  /checkpoint:
    name: # NOTE: Fill in your bucket name
    mode: MOUNT_CACHED # or MOUNT
To learn more about the different modes, see SkyPilot bucket mounting and high-performance training.
Real-world examples#
See the Model training guide for more training examples and best practices.
Recovering from application failures#
Hardware failures (e.g., node crashes) and preemptions are auto-recovered by default. However, user code failures (non-zero exit codes) are not auto-recovered by default.
In many cases, you’ll want jobs to automatically restart on application errors that are actually caused by transient hardware issues. For instance, if a training job crashes due to an NVIDIA driver issue or NCCL timeout, it should be recovered. To enable this, set max_restarts_on_errors in resources.job_recovery in the SkyPilot YAML.
resources:
  accelerators: A100:8
  job_recovery:
    # Restart the job up to 3 times on user code errors.
    max_restarts_on_errors: 3
This will restart the job, up to 3 times (for a total of 4 attempts), if your code has any non-zero exit code. Each restart runs on a newly provisioned temporary cluster.
Recovering on specific exit codes#
You can also specify a list of exit codes that should always trigger recovery, regardless of the max_restarts_on_errors limit. This is useful when certain exit codes indicate transient errors that should always be retried (e.g., NCCL timeouts, specific GPU driver issues).
resources:
  accelerators: A100:8
  job_recovery:
    max_restarts_on_errors: 3
    # Always recover if the job exits with code 33 or 34.
    # In a multi-node job, recovery is triggered if any node exits with a code in [33, 34].
    # Can also use a single integer: recover_on_exit_codes: 33
    recover_on_exit_codes: [33, 34]
In this configuration:
If the job exits with code 33 or 34, it will be recovered. Restarts triggered by these specific exit codes do not count towards the max_restarts_on_errors limit.
For any other non-zero exit code, the job will be recovered up to 3 times (as specified by
max_restarts_on_errors)
Note
For multi-node jobs, recovery is triggered if any node exits with a code in recover_on_exit_codes.
Warning
You should not use exit code 137 in recover_on_exit_codes. This code is used internally by SkyPilot and including it may interfere with proper recovery behavior.
When will my job be recovered?#
Here’s how various kinds of failures will be handled by SkyPilot:
Hardware fails (GPU errors, node crashes, preemptions): |
Tear down the old temporary cluster and provision a new one in another region, then restart the job. |
User code fails ( |
If the exit code is in |
Can’t find available resources due to capacity: |
Try other infra (clusters, regions, or clouds) indefinitely until resources are found. |
Cloud config/auth issue or invalid job configuration: |
Mark the job as |
To see the logs of user code (setup or run commands), use sky jobs logs <job_id>. If there is a provisioning or recovery issue, you can see the provisioning logs by running sky jobs logs --controller <job_id>.
Tip
Under the hood, SkyPilot uses a “controller” to provision, monitor, and recover the underlying temporary clusters. See How it works.
Running on spot instances (optional)#
To reduce costs, managed jobs can optionally run on spot instances. Spot preemptions are auto-recovered by SkyPilot, just like hardware failures.
To run on spot instances, use sky jobs launch --use-spot, or specify use_spot: true in your SkyPilot YAML.
name: spot-job

resources:
  accelerators: A100:8
  use_spot: true

run: ...
Tip
Spot instances are cloud VMs that may be “preempted”. The cloud provider can forcibly shut down the underlying VM and remove your access to it, interrupting the job running on that instance.
In exchange, spot instances are significantly cheaper than normal instances that are not subject to preemption (so-called “on-demand” instances). Depending on the cloud and VM type, spot instances can be 70-90% cheaper.
SkyPilot automatically finds available spot instances across regions and clouds to maximize availability. Any spot preemptions are automatically handled by SkyPilot without user intervention.
Note
By default, a job will be restarted from scratch after each recovery (whether from preemption or hardware failure). To avoid redoing work after recovery, implement checkpointing. Your application code can checkpoint its progress periodically to persistent storage (a Kubernetes volume or cloud bucket). The program can then reload the latest checkpoint when restarted.
Here is an example of a training job failing over different regions across AWS and GCP.

Quick comparison between managed spot jobs vs. launching unmanaged spot clusters:
Command |
Managed? |
SSH-able? |
Best for |
|---|---|---|---|
|
Yes, preemptions are auto-recovered |
No |
Scaling out long-running jobs (e.g., data processing, training, batch inference) |
|
No, preemptions are not handled |
Yes |
Interactive dev on spot instances (especially for hardware with low preemption rates) |
Either spot or on-demand/reserved#
By default, on-demand instances will be used (not spot instances). To use spot instances, you must specify --use-spot on the command line or use_spot: true in your SkyPilot YAML.
However, you can also tell SkyPilot to use both spot instance and on-demand instances, depending on availability. In your SkyPilot YAML, use any_of to specify either spot or on-demand/reserved instances as
candidate resources for a job. See documentation here for more details.
resources:
  accelerators: A100:8
  any_of:
    - use_spot: true
    - use_spot: false
In this example, SkyPilot will choose the cheapest resource to use, which almost certainly will be spot instances. If spot instances are not available, SkyPilot will fall back to launching on-demand/reserved instances.
Scaling to many jobs#
You can easily manage dozens, hundreds, or thousands of managed jobs at once. This is a great fit for batch jobs such as data processing, batch inference, or hyperparameter sweeps. To see an example launching many jobs in parallel, see Many Parallel Jobs.
Tip
For workloads that can reuse the same environment across many jobs, consider using Pools. Pools provide faster cold-starts by maintaining a set of pre-provisioned workers that can be reused across job submissions.
To increase the maximum number of jobs that can run at once, see Resource planning for managed jobs.
Managed pipelines#
A pipeline is a managed job that contains a sequence of tasks running one after another.
This is useful for running a sequence of tasks that depend on each other, e.g., training a model and then running inference on it. Different tasks can have different resource requirements to use appropriate per-task resources, which saves costs, while keeping the burden of managing the tasks off the user.
See also
Job Groups for RL for running multiple tasks in parallel instead of sequentially.
Note
In other words, a managed job is either a single task, a pipeline (sequential tasks), or a job group (parallel tasks). All managed jobs are submitted by sky jobs launch.
To run a pipeline, specify the sequence of tasks in a YAML file. Here is an example:
name: pipeline

---

name: train

resources:
  accelerators: V100:8
  any_of:
    - use_spot: true
    - use_spot: false

file_mounts:
  /checkpoint:
    name: train-eval # NOTE: Fill in your bucket name
    mode: MOUNT

setup: |
  echo setup for training

run: |
  echo run for training
  echo save checkpoints to /checkpoint

---

name: eval

resources:
  accelerators: T4:1
  use_spot: false

file_mounts:
  /checkpoint:
    name: train-eval # NOTE: Fill in your bucket name
    mode: MOUNT

setup: |
  echo setup for eval

run: |
  echo load trained model from /checkpoint
  echo eval model on test set
The YAML above defines a pipeline with two tasks. The first name:
pipeline names the pipeline. The first task has name train and the
second task has name eval. The tasks are separated by a line with three
dashes ---. Each task has its own resources, setup, and
run sections. Tasks are executed sequentially. If a task fails, later tasks are skipped.
Tip
To explicitly indicate a pipeline (sequential execution), you can add
execution: serial to the header. This is optional since pipelines
are the default when execution is omitted. Use execution: parallel
for job groups instead.
To pass data between the tasks, use a shared file mount. In this example, the train task writes its output to the /checkpoint file mount, which the eval task is then able to read from.
To submit the pipeline, the same command sky jobs launch is used. The pipeline will be automatically launched and monitored by SkyPilot. You can check the status of the pipeline with sky jobs queue or sky dashboard.
$ sky jobs launch -n pipeline pipeline.yaml

$ sky jobs queue

Fetching managed job statuses...
Managed jobs
In progress jobs: 1 RECOVERING
ID  TASK  NAME      REQUESTED                    SUBMITTED    TOT. DURATION  JOB DURATION  #RECOVERIES  STATUS
8         pipeline  -                            50 mins ago  47m 45s        -             1            RECOVERING
 ↳  0     train     1x [V100:8][Spot|On-demand]  50 mins ago  47m 45s        -             1            RECOVERING
 ↳  1     eval      1x [T4:1]                    -            -              -             0            PENDING
Note
The $SKYPILOT_TASK_ID environment variable is also available in the run section of each task. It is unique for each task in the pipeline.
For example, the $SKYPILOT_TASK_ID for the eval task above is:
“sky-managed-2022-10-06-05-17-09-750781_pipeline_eval_8-1”.
File uploads for managed jobs#
For managed jobs, SkyPilot uses an intermediate bucket to store files used in the task, such as local file_mounts and the workdir.
If you do not configure a bucket, SkyPilot will automatically create a temporary bucket named skypilot-filemounts-{username}-{run_id} for each job launch. SkyPilot automatically deletes the bucket after the job completes.
Object store access is not necessary to use managed jobs. If cloud object storage is not available (e.g., Kubernetes deployments), SkyPilot automatically falls back to a two-hop upload that copies files to the jobs controller and then downloads them to the jobs.
Tip
To force disable using cloud buckets even when available, set jobs.force_disable_cloud_bucket in your config:
# ~/.sky/config.yaml
jobs:
  force_disable_cloud_bucket: true
Setting the job files bucket#
If you want to use a pre-provisioned bucket for storing intermediate files, set jobs.bucket in ~/.sky/config.yaml:
# ~/.sky/config.yaml
jobs:
  bucket: s3://my-bucket  # Supports s3://, gs://, https://<azure_storage_account>.blob.core.windows.net/<container>, r2://, cos://<region>/<bucket>
If you choose to specify a bucket, ensure that the bucket already exists and that you have the necessary permissions.
When using a pre-provisioned intermediate bucket with jobs.bucket, SkyPilot creates job-specific directories under the bucket root to store files. They are organized in the following structure:
# cloud bucket, s3://my-bucket/ for example
my-bucket/
├── job-15891b25/            # Job-specific directory
│   ├── local-file-mounts/   # Files from local file mounts
│   ├── tmp-files/           # Temporary files
│   └── workdir/             # Files from workdir
└── job-cae228be/            # Another job's directory
    ├── local-file-mounts/
    ├── tmp-files/
    └── workdir/
When using a custom bucket (jobs.bucket), the job-specific directories (e.g., job-15891b25/) created by SkyPilot are removed when the job completes.
Tip
Multiple users can share the same intermediate bucket. Each user’s jobs will have their own unique job-specific directories, ensuring that files are kept separate and organized.
Calling SkyPilot API from within managed jobs#
By default (api_server_access: true), SkyPilot automatically injects API
server credentials into the job’s environment when the server supports it. This
means managed jobs can call the SkyPilot CLI/SDK to launch new workloads:
setup: |
  pip install "skypilot-nightly[remote]"

run: |
  sky jobs launch -y -n nested --cpus 2 "echo hello from nested job"
The credentials are automatically injected and revoked when the job finishes. To disable this, set api_server_access: false.
Note
Credential injection requires the SkyPilot API server to have service accounts enabled. If not enabled, injection is silently skipped.
How it works#
Under the hood, SkyPilot manages the full lifecycle of each managed job: provisioning temporary clusters, monitoring job health, recovering from failures, and cleaning up resources.
With a remote SkyPilot API server, the API server manages jobs directly. The number of jobs that can run in parallel is bounded by the total memory available to the API server. See Resource planning for managed jobs for a capacity table and tuning guidance.
Tip
This is referred to as “consolidation mode” in SkyPilot configuration.
Note
When using a RollingUpdate upgrade strategy, local file_mounts and workdir for managed jobs are stored on the pod’s ephemeral filesystem and may be lost when the old pod is replaced. To avoid this, enable persistent storage with a ReadWriteMany (RWX) PVC, or use cloud buckets / volumes / git instead of local paths.
[Legacy] Using a remote jobs controller#
Alternatively, SkyPilot can launch a dedicated jobs controller – a small on-demand CPU VM or Kubernetes pod – to manage all jobs. This is used automatically when running with a local API server (no remote server deployed), or can be explicitly enabled.

To use a remote jobs controller with a remote API server, set consolidation_mode: false:
# ~/.sky/config.yaml
jobs:
  controller:
    consolidation_mode: false
Note
You must restart the API server after changing this setting for it to take effect.
Note
If you were using managed jobs before upgrading to a version with consolidation mode, your existing remote jobs controller will continue to be used automatically. See Migrating from a remote jobs controller to switch to the default mode.
The controller cluster is automatically launched when the first managed job is submitted, and it is autostopped after it has been idle for 10 minutes (i.e., after all managed jobs finish and no new managed job is submitted in that duration). Thus, no user action is needed to manage its lifecycle.
You can see the controller with sky status -u and refresh its status by using the -r/--refresh flag.
While the cost of the jobs controller is negligible (~$0.25/hour when running and less than $0.004/hour when stopped),
you can still tear it down manually with
sky down <job-controller-name>, where the <job-controller-name> can be found in the output of sky status -u.
Note
Tearing down the jobs controller loses all logs and status information for the finished managed jobs. It is only allowed when there are no in-progress managed jobs to ensure no resource leakage.
High availability controller#
Warning
Deprecated. HA mode for the remote jobs controller is deprecated. By default, the API server runs the jobs controller directly via consolidation mode, which already provides resilience through the Kubernetes Deployment and persistent database — no separate HA controller is needed.
High availability mode ensures the remote controller cluster remains resilient to failures by running it as a Kubernetes Deployment with automatic restarts and persistent storage. This helps maintain management capabilities even if the controller pod crashes or the node fails.
To enable high availability for Managed Jobs, set the high_availability flag to true under jobs.controller in your ~/.sky/config.yaml, and ensure the controller runs on Kubernetes:
jobs:
  controller:
    consolidation_mode: false
    resources:
      cloud: kubernetes
    high_availability: true
This will deploy the controller as a Kubernetes Deployment with persistent storage, allowing automatic recovery on failures.
Using long-lived credentials#
Since the jobs controller is a long-lived instance that manages other cloud instances, it’s best to use static credentials that do not expire. If a credential expires, it could leave the controller with no way to clean up a job, leading to expensive cloud instance leaks.
To use long-lived static credentials for the jobs controller, just make sure the right credentials are in use by SkyPilot. They will be automatically uploaded to the jobs controller. If you’re already using local credentials that don’t expire, no action is needed.
To set up credentials:
AWS: Create a dedicated SkyPilot IAM user and use a static
~/.aws/credentialsfile.GCP: Create a GCP service account with a static JSON key file.
Other clouds: Make sure you are using credentials that do not expire.
Customizing controller resources#
You may want to customize the jobs controller resources for several reasons:
Increasing the maximum number of jobs that can be run concurrently, which is based on the controller’s memory allocation. (Default: ~600, see best practices)
Use a lower-cost controller (if you have a low number of concurrent managed jobs).
Enforcing the jobs controller to run on a specific location. (Default: cheapest location)
Changing the disk_size of the jobs controller to store more logs. (Default: 50GB)
To achieve the above, you can specify custom configs in ~/.sky/config.yaml with the following fields:
jobs:
  # NOTE: these settings only take effect for a new jobs controller, not if
  # you have an existing one.
  controller:
    resources:
      # All configs below are optional.
      # Specify the location of the jobs controller.
      infra: gcp/us-central1
      # Bump cpus to allow more managed jobs to be launched concurrently. (Default: 4+)
      cpus: 8+
      # Bump memory to allow more managed jobs to be running at once.
      # By default, it scales with CPU (4x).
      memory: 64+
      # Specify the disk_size in GB of the jobs controller.
      disk_size: 100
The resources field has the same spec as a normal SkyPilot job; see here.
Note
These settings will not take effect if you have an existing controller (either stopped or live). For them to take effect, tear down the existing controller first, which requires all in-progress jobs to finish or be canceled.
To see your current jobs controller, use sky status -u.
$ sky status -u --refresh

Clusters
NAME                          INFRA             RESOURCES                                  STATUS   AUTOSTOP  LAUNCHED
my-cluster-1                  AWS (us-east-1)   1x(cpus=16, m6i.4xlarge, ...)              STOPPED  -         1 week ago
my-other-cluster              GCP (us-central1) 1x(cpus=16, n2-standard-16, ...)           STOPPED  -         1 week ago
sky-jobs-controller-919df126  AWS (us-east-1)   1x(cpus=4, m6i.xlarge, disk_size=50)       STOPPED  10m       1 day ago

Managed jobs
No in-progress managed jobs.

Services
No live services.
In this example, you can see the jobs controller (sky-jobs-controller-919df126) is an m6i.xlarge on AWS, which is the default size.
To tear down the current controller, so that new resource config is picked up, use sky down.
$ sky down sky-jobs-controller-919df126

WARNING: Tearing down the managed jobs controller. Please be aware of the following:
 * All logs and status information of the managed jobs (output of `sky jobs queue`) will be lost.
 * No in-progress managed jobs found. It should be safe to terminate (see caveats above).
To proceed, please type 'delete': delete
Terminating cluster sky-jobs-controller-919df126...done.
Terminating 1 cluster ━━━━━━━━━━━━━━━━━━━━━━━━━━━━━━━━━━━━━━━━ 100% 0:00:00
The next time you use sky jobs launch, a new controller will be created with the updated resources.
Scaling best practices#
Tip
It’s highly recommended to use long-lived credentials for cloud authentication. This is so that the jobs controller credentials do not expire. This is particularly important in large production runs to avoid leaking resources.
The number of active jobs that the controller supports is based on available memory. There are two limits:
Actively launching job count: limit is
8 * floor((memory - 2GiB) / 3.59GiB), with a maximum of 512 jobs. A job counts towards this limit when it is first starting, launching instances, or recovering.The default controller size has 16 GiB memory, meaning 24 jobs can be actively launching at once.
Running job count: limit is
200 * floor((memory - 2GiB) / 3.59GiB), with a maximum of 2000 jobs.The default controller supports up to 600 jobs running in parallel.
The default size is appropriate for most moderate use cases, but if you need to run hundreds or thousands of jobs at once, you should increase the controller size. Each additional ~3.6 GiB of controller memory adds capacity for 8 concurrent launches and 200 concurrently running jobs.
Increase CPU modestly as memory grows to keep controller responsiveness high, but note that the hard parallelism limits are driven by available memory. A ratio of 4 GiB memory per CPU works well in our testing.
For absolute maximum parallelism, the following per-cloud configurations are recommended:
jobs:
  controller:
    resources:
      infra: aws
      cpus: 192
      memory: 4x
      disk_size: 500
jobs:
  controller:
    resources:
      infra: gcp
      cpus: 128
      memory: 4x
      disk_size: 500
jobs:
  controller:
    resources:
      infra: azure
      cpus: 96
      memory: 4x
      disk_size: 500
Note
Remember to tear down your controller to apply these changes, as described above.
With this configuration, you can launch up to 512 jobs at once. Once the jobs are launched, up to 2000 jobs can be running in parallel.
Migrating from a remote jobs controller#
If you were using managed jobs before upgrading to a version with default consolidation mode (0.12+), your existing remote jobs controller will continue to be used. SkyPilot does not auto-enable consolidation mode when an existing controller cluster is found.
To check if you have an existing controller:
$ sky status -u | grep sky-jobs-controller
If a controller is listed, you are using a remote jobs controller. To migrate to the default mode (API server manages jobs directly):
Cancel all in-progress managed jobs:
sky jobs cancel -aTear down the controller:
sky down <controller-name>Restart the API server to pick up the change.
After restart, the API server will manage jobs directly, and no separate controller cluster will be created.